With just a few simple steps, you can craft a true mirror right in the comfort of your home. By following this guide, you will learn how to assemble two mirrors at a precise angle, allowing you to see yourself as others do.
Unlock the secrets of self-reflection with a DIY true mirror. Dive into the fascinating world of optical illusions and discover how to craft your very own non-reversing mirror. Let’s embark on a journey to see ourselves in a whole new light.
Discover the art of creating a non-reversing mirror from the comfort of your home. Learn step-by-step techniques to assemble two mirrors into a true reflection of reality.
Materials Needed For Making A True Mirror
Creating a true mirror at home requires a few essential materials. You’ll need two mirrors with front-surfaced reflective surfaces to eliminate gaps between reflections. Additionally, prepare wooden triangles with precise 90-degree angles to frame the mirrors securely.
Ensure you have epoxy glue, plywood or plastic for enclosure, wood screws, and wooden strips. These materials will aid in mounting the mirrors accurately and securely. With the right tools and attention to detail, assembling the true mirror becomes an achievable DIY project for your home.
Read this blog:http://HOW TO REFINISH A DINING ROOM TABLE
Step-By-Step Guide: Preparing The Mirrors
Ensure mirrors are front-surfaced for accuracy and minimal reflection gaps. Securely attach mirrors to precisely angled wooden triangles for stability.
- Choose Suitable Mirrors: Opt for mirrors with front-surfaced reflective surfaces to minimize gaps between reflections.
- Handle with Care: Wear gloves and eye protection when handling the mirrors to avoid injury from sharp edges.
- Ensure Precise Angles: Use wooden triangles with accurate 90-degree angles to frame the mirrors securely.
- Verify Accuracy: Check the triangles by aligning them opposite each other to ensure no gaps at the top or bottom.
- Secure Mirrors: Attach the mirrors to the triangles using screws and wooden strips, ensuring a flush fit and a margin around the edges.
- Adjust if Necessary: Use wedges to ensure precise orientation of the mirrors and adjust angles as needed before securing them permanently.
Measuring And Marking The Angles For Accuracy
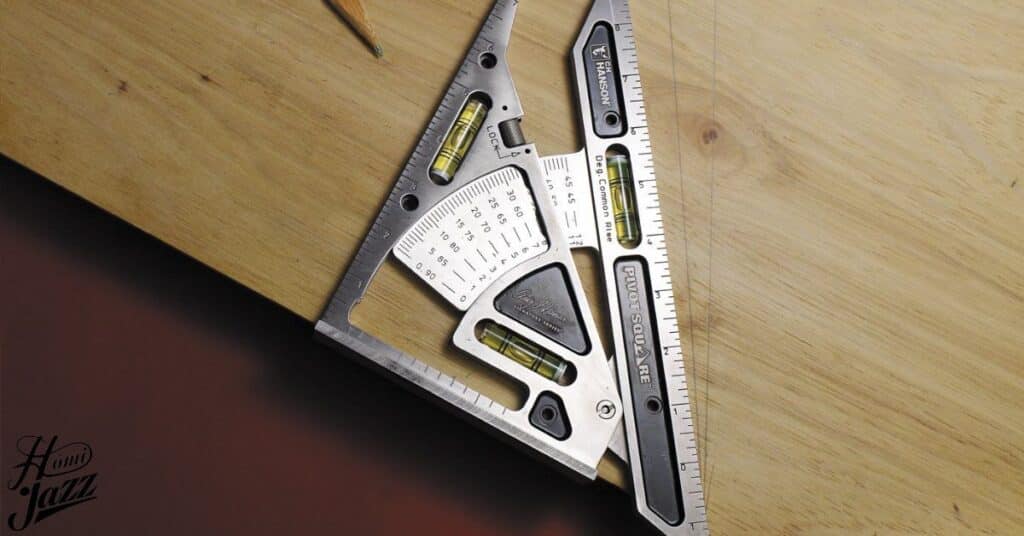
To measure and mark the angles accurately, use a protractor and ruler for precise alignment. Ensure the angles are set at a perfect 90 degrees to create a seamless reflection. Double-check the measurements to avoid any errors in the angle alignment.
Mark the angles on the wooden triangles clearly and distinctly for easy reference during assembly. Use a pencil or marker to make visible markings that indicate the correct alignment. Ensure the angles are consistent on both triangles to maintain symmetry in the mirror setup.
Read this also:http://HOW TO RESIZE A RING BIGGER AT HOME
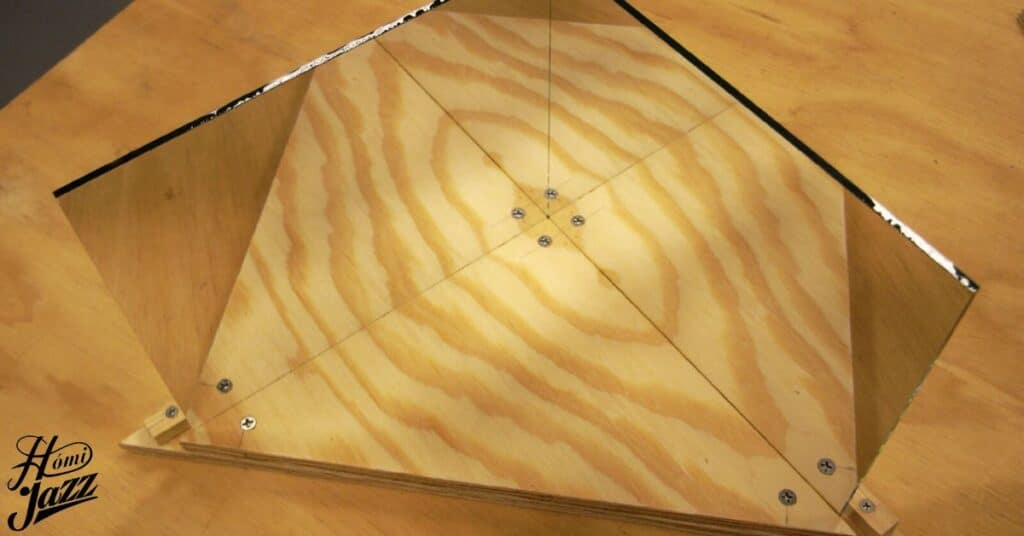
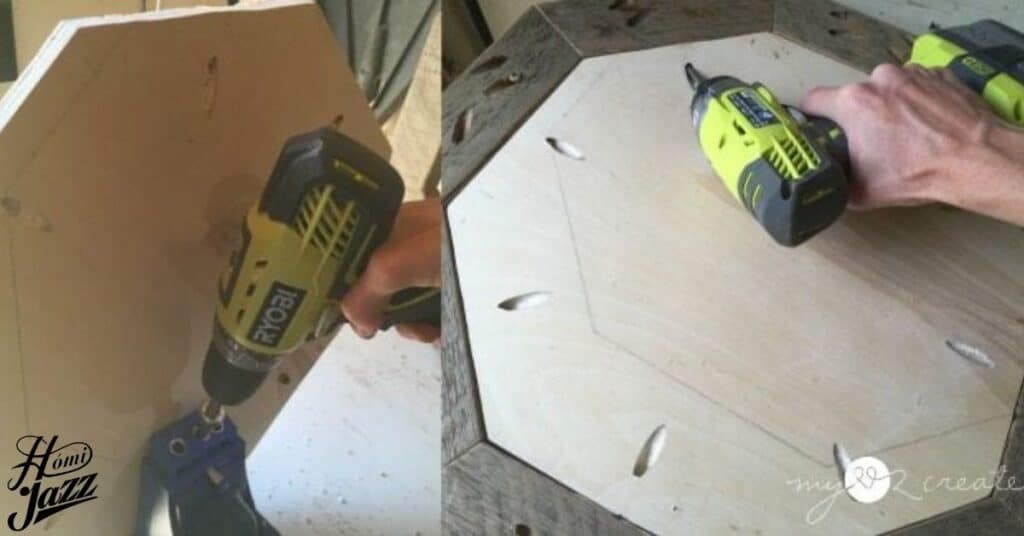
Constructing The Mirror Frame: Setting Up
Constructing the mirror frame involves assembling the wooden triangles with precision. Secure the small triangles onto larger ones using screws for stability. Double-check the angles to ensure they form a perfect 90-degree junction.
Position the mirrors vertically within the gaps of the frame and use small wedges to hold them firmly in place. Verify the precise orientation of the mirrors before applying epoxy to secure them. Once the mirrors are securely mounted, the frame provides stability for the true mirror setup.
Positioning The Mirrors Correctly For Reflection
Positioning the mirrors correctly is crucial for accurate reflection. Ensure the mirrors are aligned at a perfect 90-degree angle for optimal results. Use small wedges to hold the mirrors firmly in place within the frame.
Verify that the mirrors are precisely oriented before securing them with epoxy. Adjust the mirrors as needed to eliminate any gaps or misalignments. Once properly positioned, the mirrors will reflect images without distortion.
Securing The Mirrors In Place
Securing the mirrors in place is essential to prevent movement or misalignment. Utilize wedges behind each mirror to firmly hold them against the frame. Apply quick-setting epoxy around the mirrors and wedges for a secure bond.
Ensure the mirrors are precisely oriented before applying epoxy to avoid distortions. Allow the epoxy to harden for at least an hour to ensure a strong hold. Once secured, the mirrors will maintain their position for accurate reflection.
Mounting The Setup (Optional) And Testing The True Mirror
Mounting the setup is optional but recommended for stability and safety. Consider mounting the true mirror in an enclosure to protect the mirrors and edges. Test the true mirror by facing it and slowly rotating it to observe any changes in reflection.
Ensure the setup is securely mounted to prevent accidents or damage. Test the mirror’s functionality by observing your reflection and ensuring it accurately reflects your appearance as others see you. Adjust the angle if necessary to achieve the desired reflection.
Additional Tips And Troubleshooting For DIY True Mirrors
For additional tips, ensure the mirrors are clean and free of debris before assembly. Use caution when handling glass to avoid accidents or injuries.
Troubleshoot any issues by checking the angles between mirrors for accuracy. Adjust the setup carefully to eliminate any gaps or misalignments that may affect the reflection.
Understanding The Concept: What A True Mirror Reflects
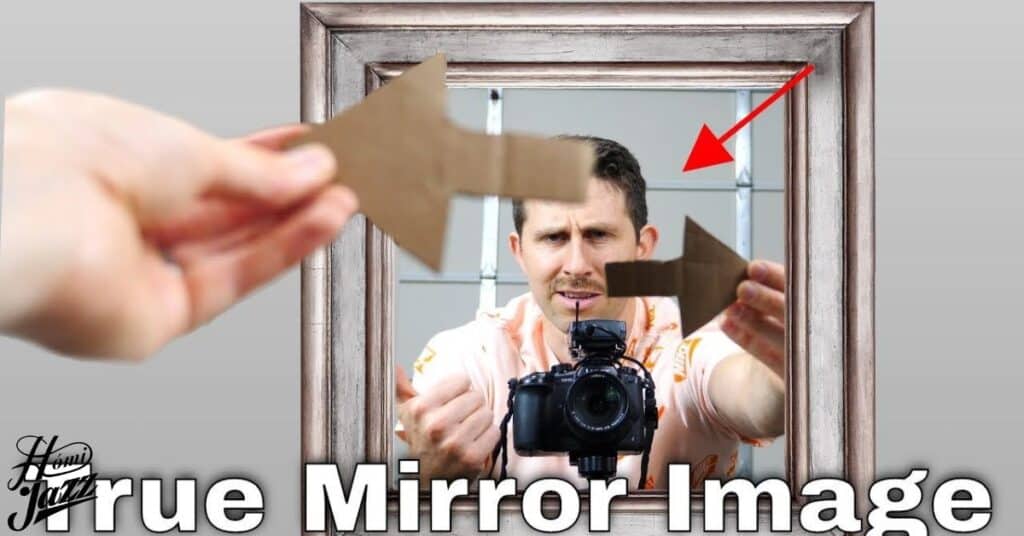
A true mirror reflects an image without flipping it horizontally, unlike standard mirrors. It allows you to see yourself as others do, with your features appearing as they would to someone facing you.
This concept is achieved by positioning two mirrors at a precise 90-degree angle to each other. The reflection undergoes a total rotation of 180 degrees, presenting an accurate portrayal of your appearance.
Why Are True Mirrors So Expensive
True mirrors can be expensive due to the precision required in their construction. The process involves assembling two mirrors at a perfect 90-degree angle, which demands skilled craftsmanship. Additionally, the use of high-quality materials, such as first surface mirrors, contributes to the cost.
How Does A True Mirror Work
A true mirror works by using two mirrors positioned at a precise 90-degree angle to each other. When light reflects off the first mirror and then the second mirror, it rotates a total of 180 degrees before reaching the eyes, resulting in a non-reversed image. This setup allows individuals to see themselves as others see them, providing a more accurate reflection.
Frequently Asked Questions
Can we make true mirror at home?
Yes, you can make a true mirror at home using two regular mirrors positioned at a precise 90-degree angle to each other.
How do you make a truth mirror?
To make a true mirror, you need to position two regular mirrors at a 90-degree angle to create a non-reversed reflection.
How do you make a mirror show your true self?
To make a mirror show your true self, use front-surfaced mirrors positioned accurately to reflect light without reversing the image.
How to make your own mirror at home?
You can make your own mirror at home using materials like glass or acrylic sheets coated with a reflective material like silvering solution.
What material can be used as a mirror?
Materials such as glass or acrylic sheets can be used as mirrors when coated with a reflective material like silvering solution.
Conclusion
Making a true mirror at home is a rewarding DIY project that offers a unique perspective on self-reflection. By using simple materials like mirrors, plywood, and adhesive, anyone can create a non-reversing mirror that accurately reflects how others see them. Through careful measurements, precise angles, and secure mounting, the process ensures an accurate reflection without distortion. Experimenting with different materials and techniques allows for customization and creativity in the design process.
Whether for personal use or as a fun project with friends and family, crafting a true mirror provides a deeper understanding of optics and self-perception. Overall, the experience of making a true mirror at home fosters a sense of accomplishment and curiosity about the world of reflections, making it a fulfilling endeavor for DIY enthusiasts of all skill levels.

Howdy is behind this home blog, sharing personal stories, thoughts, and insights from daily life. I can dedicated to bringing you the latest trends, expert advice, and creative ideas to make your home the sanctuary you’ve always dreamed of. Whether you’re looking for DIY tips, home decor inspiration, home loans, rentals or renovations.