Plastering walls is a daunting task that often leaves DIYers feeling defeated. But fear not, my friends! There are plenty of ways to achieve those coveted smooth walls without the hassle of plastering.
In this guide, we’ll explore techniques like sanding, joint compound application, strategic dabbing, and even a nifty trick with lining paper. Say goodbye to unsightly bumps and hello to a flawless canvas, all without the stress of plastering.
Whether you’re dealing with minor imperfections or full-blown wall woes, these methods have got you covered. So, grab your supplies, and let’s dive into the wonderful world of wall smoothing – no plastering required!
What Is The Difference Between Plastering And Skimming?
Before we get our hands dirty, let’s clear up a common source of confusion – the difference between plastering and skimming.
Think of plastering as the big kahuna – it’s the process of completely replacing the old, damaged plaster with fresh, new material. We’re talking a full-on overhaul here, often required in older homes where the existing plaster has seen better days.
Skimming, on the other hand, is a plastering technique that involves applying a thin layer of new plaster over the existing surface. It’s like giving your wall a fresh coat of paint, but with plaster instead of, well, paint.
The goal of skimming is to smooth out any imperfections or unevenness in the existing plaster, prepping the surface for decorating without having to start from scratch.
What To Use To Smooth Out Walls
So, if your walls are drywall (that good ol’ gypsum board we all know and love), chances are you’ll only need to skim ’em, not full-on plaster.
Here’s what you’ll need to have on hand:
Before we dive into the nitty-gritty of wall smoothing techniques, let’s talk tools. After all, you can’t expect to transform those bumpy surfaces without the right gear.
- Sandpaper (different grits for different stages)
- Scraper
- Trowel
- Putty knife
- Joint compound
- Filler
- Dust mask (safety first, folks!)
- Safety glasses (protecting those peepers is a must)
- Water bucket or bowl
- Lining paper
- Adhesive
Now, you won’t necessarily need every single item on this list – the tools you’ll require will depend on the smoothing method you choose to use. But it’s always better to be prepared, right?
How To Smooth Walls Without Plastering
Alright, enough chit-chat – let’s get down to business and explore some tried-and-true techniques for achieving those ultra-smooth walls sans plastering.
Sandpaper
This one’s about as straightforward as it gets – grab some sandpaper and start sanding away those lumps, bumps, and imperfections.
The key here is to pay extra attention to the areas where the surface is particularly uneven or bumpy. And don’t forget to suit up with a dust mask and safety glasses – you don’t want to be breathing in all that wall debris or getting it in your eyes.
Now, a word of caution: while sanding is certainly effective for minor imperfections, it’s not exactly the most efficient method if your wall is riddled with major issues. In that case, you’ll want to explore some of the other techniques we’ll cover.
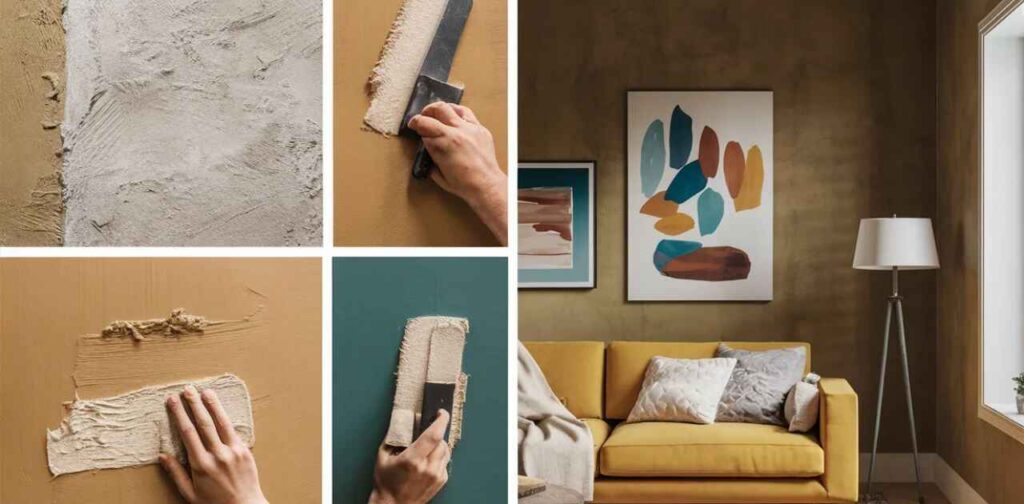
Use A Joint Compound
If sanding feels a bit too labor-intensive for your liking, why not give joint compound a try?
This nifty little product is way thinner and more manageable than full-on plaster, making it much easier to work with and less likely to result in those dreaded rookie mistakes.
Simply grab a trowel or putty knife, slather on that joint compound evenly across the wall, and let it dry. Once it’s set, go over the surface with some sandpaper to achieve that ultra-smooth finish.
And if you’re not quite satisfied with the results after the first round, no worries – you can repeat the process until your wall is as smooth as a baby’s bottom.
Dot and Dab
For those of you with only a few trouble spots to address, the dot and dab technique might just be your new best friend.
Instead of tackling the entire wall, this method allows you to focus your efforts (and materials) on the specific areas that need a little extra TLC.
Grab a small amount of plaster (or joint compound, if you prefer) and dab it directly onto the bumps, cracks, or imperfections. Then, use a putty knife to smooth it out and blend it seamlessly with the surrounding surface.
Fair warning, though – this technique is best reserved for minor touch-ups and spot treatments. If your entire wall resembles a war zone, you’ll want to explore some of the other options we’ve got in store.
Fill Bumps and Cracks
Speaking of tackling those pesky bumps and cracks, why not try your hand at using a good ol’ fashioned filler?
Fillers are great for evening out those unsightly imperfections without having to slather plaster or compound across the entire wall. Simply apply the filler directly to the trouble spots, smoothing it out with a trowel or putty knife as you go.
One thing to keep in mind with fillers, though, is the potential for shrinkage. Sometimes, the filler can shrink slightly as it dries, leaving you with a less-than-perfect finish.
If that happens, no need to panic – just wait for it to fully dry, then go back and re-apply filler to any areas that need a little extra oomph.
Hang Lining Paper
For those of you who’d rather not mess around with plaster, compounds, or fillers at all, hanging lining paper might just be the solution you’ve been searching for.
Lining paper (also known as insulation paper) is a type of material that’s designed to be applied directly to the wall before you slap on your chosen wallpaper or paint.
To hang it, you’ll need to grab some adhesive and apply it to the back of the paper itself. Then, carefully smooth the paper onto the wall, making sure to eliminate any air bubbles or wrinkles as you go.
The beauty of lining paper is that it creates a smooth, even surface for your decorating efforts, effectively masking any lumps, bumps, or imperfections in the underlying wall.
Clean The Walls With Soapy Water
Sometimes, the simplest solutions are the most effective – and that’s certainly true when it comes to smoothing walls with good ol’ soapy water.
Yep, you read that right a simple mixture of warm water and some household detergent can work wonders for evening out those bumpy surfaces.
Just fill up a bucket or bowl with the soapy solution, grab a cloth, and start wiping it onto the wall. For any particularly stubborn areas, apply a little extra elbow grease and scrub a bit harder.
Once you’ve covered the entire surface, be sure to let it dry completely before moving on to the next step in your decorating process.
While this method won’t work miracles on severely damaged or uneven walls, it’s a great option for tackling minor imperfections or giving your surface a general smoothing before painting or wallpapering.
Prepping for Success: Wall Preparation Tips
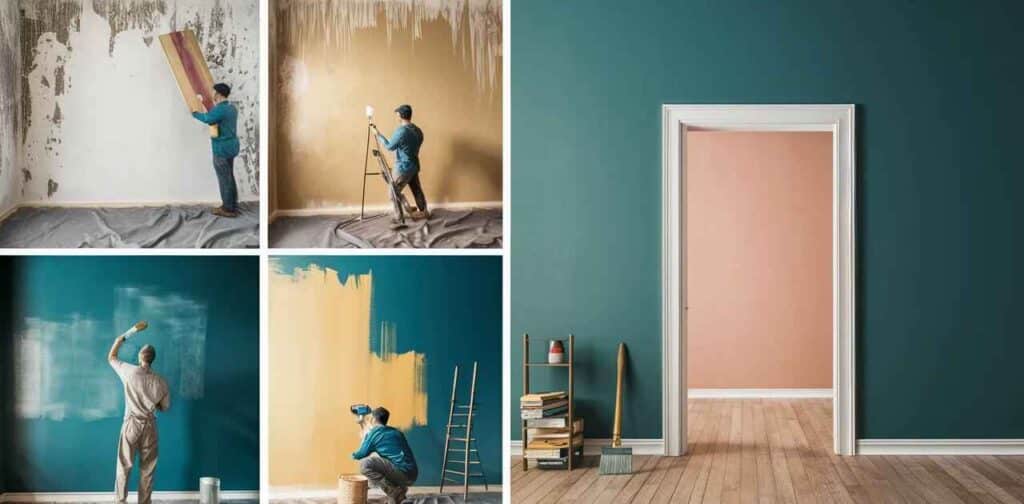
Now, before you dive headfirst into any of these wall smoothing techniques, there’s one crucial step you can’t afford to skip: proper preparation.
No matter which method you choose, ensuring your wall is clean, dry, and free of any loose debris or coatings is essential for achieving a smooth, long-lasting finish.
Here are a few prep tips to keep in mind:
- Remove any old wallpaper or peeling paint by scoring the surface with a scoring tool and then carefully stripping it away.
- Use a putty knife or scraper to remove any loose plaster, joint compound, or other materials from the wall.
- Fill any deep cracks, holes, or divots with a suitable filler or patching compound, allowing it to dry completely before proceeding.
- Clean the entire surface thoroughly with a damp cloth or sponge to remove any dust, dirt, or grime that could interfere with adhesion.
- In cases of severe damage or unevenness, you may need to skim the wall with a thin layer of joint compound or plaster to create a smooth base before applying your chosen smoothing technique.
Tips for Seamless Blending and a Flawless Finish
Alright, so you’ve prepped your wall, gathered your supplies, and you’re ready to get down to business. But before you start slapping on that joint compound or hanging that lining paper, there are a few extra tips and tricks to keep in mind for achieving a truly seamless, professional-looking finish.
Feathering Is Your Friend
Whether you’re using a filler, joint compound, or even good ol’ plaster, feathering is going to be your new best bud. This technique involves gradually thinning out the edges of your material as you smooth it onto the wall, creating a seamless transition between the treated area and the surrounding surface.
To feather like a pro, hold your trowel or putty knife at a low angle and gently blend the edges of your material outward, creating a gradual taper. This will help prevent those unsightly ridges or harsh lines that can make your handiwork look amateur.
All About Those Edges
Speaking of edges, paying extra attention to the corners, trim, and other areas where the wall meets other surfaces is crucial for a flawless finish.
Use a smaller putty knife or even your finger to smooth and blend your material into those tricky nooks and crannies, ensuring a clean, seamless transition.
Don’t be afraid to get up close and personal with these areas – it’s the little details that can really make or break the overall look.
Lighting Is Everything
One of the easiest ways to spot imperfections in your freshly smoothed wall is to shine a bright light across the surface at an angle.
Any remaining bumps, ridges, or uneven areas will cast shadows, making them easier to identify and address before you move on to the final decorating stage.
So, grab a strong work light or even your trusty flashlight, and take a good, long look at your handiwork from various angles. If you spot any trouble spots, don’t hesitate to go back and touch them up until you’re satisfied with the results.
Also, Read this Blog:
Gleaming Primrose Mirror Look For Less
Wallpaper, Paint, or Something More? Decorating Your Smooth Wall
Congratulations, my friend you’ve officially conquered the art of wall smoothing without plastering! But your journey doesn’t end there.
Now that you’ve got a beautiful, even surface to work with, it’s time to decide how you want to dress it up.
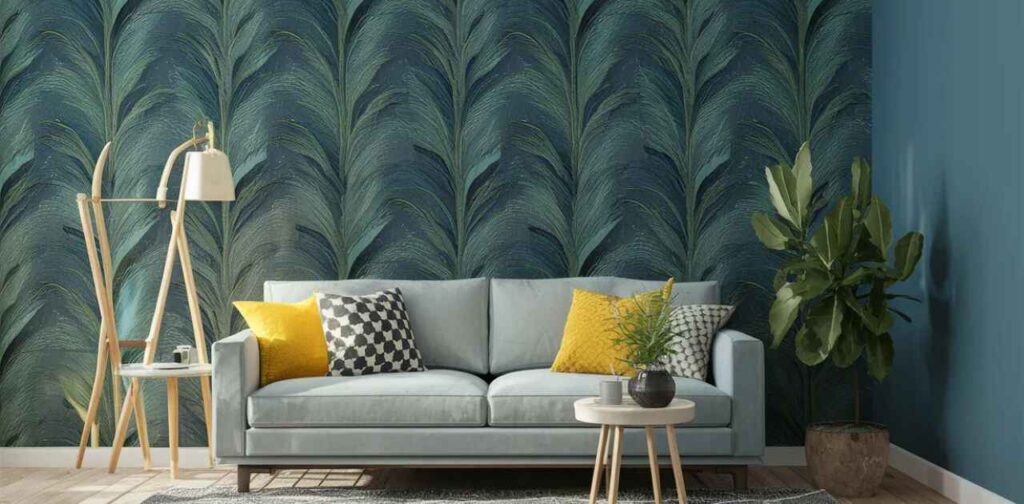
Wallpaper For those of you with a flair for pattern and texture, wallpaper is an excellent choice for showcasing your newly smoothed walls.
Just be sure to follow the manufacturer’s instructions carefully when it comes to prepping and applying the paper, as any remaining imperfections or unevenness can show through and ruin the overall effect.
Paint Of course, you can’t go wrong with a fresh coat (or two, or three) of high-quality paint.
Not only will it add a pop of color and freshness to your space, but it can also help disguise any minor imperfections that might still be lingering on your smoothed surface.
Just be sure to use a high-quality primer and paint, and don’t skimp on the prep work – a properly cleaned and primed wall will ensure a smoother, more even finish.
Get Creative But who says you have to stop at just paint or wallpaper? With your newly smoothed canvas, the decorating possibilities are endless!
Consider adding some depth and texture with a trendy wall treatment like shiplap, board and batten, or even a hand-troweled plaster finish (yes, a little bit of plaster can go a long way when used intentionally as a design element).
Or, get really creative and experiment with decoupage, stenciling, or even a bold mural to transform your freshly smoothed wall into a true work of art.
Maintain That Smooth Perfection: Upkeep Tips
Alright, so you’ve put in the hard work, and your newly smoothed wall is looking better than ever. But the job’s not quite done yet to keep that pristine finish looking its best for years to come, a little bit of regular upkeep is key.
Here are a few tips to keep in mind:
- Dust and clean your walls regularly using a microfiber cloth or duster specifically designed for walls and surfaces. This will help prevent the buildup of grime and dirt that can dull or discolor your handiwork over time.
- Be gentle when cleaning avoid using harsh scrubbing motions or abrasive cleaners that could potentially damage the surface of your smoothed wall.
- If you do notice any minor scuffs, scratches, or imperfections starting to appear, don’t hesitate to touch them up with a bit of joint compound, filler, or paint (whichever material you originally used to smooth the wall).
- For more significant damage or wear and tear, you may need to repeat the smoothing process on the affected area to restore that like-new finish.
- Consider repainting or re-wallpapering your smoothed walls every few years to keep them looking fresh and vibrant.
By following these simple upkeep guidelines, you’ll be able to enjoy the fruits of your labor – those beautifully smooth walls for years to come.
There you have it, folks a comprehensive guide to achieving ultra-smooth walls without the hassle (and potential disasters) of full-on plastering. Whether you opt for sandpaper, joint compound, filler, or any of the other techniques we covered, the road to wall perfection is well within your reach.
Summary
Smoothing bumpy walls doesn’t have to be a plaster-filled nightmare. This guide shares simple techniques like sanding, using joint compound, dabbing on filler, and hanging lining paper to transform those unsightly surfaces. No more stressing over plastering skills!
With just some basic tools and a bit of elbow grease, you can achieve a flawlessly smooth canvas, ready for paint, wallpaper, or any decorative treatment your heart desires. Say goodbye to those pesky lumps and bumps for good – the secret to seamless walls lies within these straightforward, plaster-free methods.
FAQ’s
Is sanding effective for significant wall imperfections?
Sanding works well for minor bumps and unevenness, but more severe wall damage may require alternative smoothing methods like joint compound or filler application.
How do I prevent visible seams when using joint compound?
Proper feathering technique is key – hold your trowel at a low angle and gradually blend the edges outward for a seamless transition.
Can I use lining paper over existing wallpaper?
It’s best to remove any old wallpaper first, as the lining paper may not adhere properly and could eventually bubble or peel.
How do I maintain smoothed walls long-term?
Regular dusting, gentle cleaning with microfiber cloths, and touch-ups as needed can help your smoothed walls look pristine for years. Repainting/re-wallpapering every few years also helps refresh the finish.

Howdy is behind this home blog, sharing personal stories, thoughts, and insights from daily life. I can dedicated to bringing you the latest trends, expert advice, and creative ideas to make your home the sanctuary you’ve always dreamed of. Whether you’re looking for DIY tips, home decor inspiration, home loans, rentals or renovations.